By David P. Monyhan (retired)
 The most critical part of any valve job is the ability to make concentric contact to the valve seat for proper sealing. Without that concentric contact all your work literally goes up in smoke, in the form of black smoke from out of the exhaust system.
All valve refacers do basically the same thing – they grind valves. But, not all valve refacers grind the valves correctly. There are a few basic points of maintenance that hold true for all valve refacers.
First, start with a clean machine! There is nothing worse than trying to grind valves with a dirty, non-maintained machine. Take a little time each day to insure your valve refacer is wiped down, and ready to use when you come to work the next day. Start by using a shop towel to wipe off all excess oil, grease and grit from all surfaces. Then get the heavy-duty cleaner and again wipe all surfaces again. Empty the coolant/oil reservoir and wipe out the sludge. If your machine is equipped with a strainer or filter for the oil make sure that gets cleaned out as well. You may want to use some solvent to remove the stains left over from days gone by. Turn your machine on its side and clean all of the surfaces to remove the buildup from underneath.
Second, go through and make sure your drive belts are in good shape. Look at them as you would a fan belt on your car. If you see cracking or flat spots its time to replace the belt. Look at the pulley grooves. Make sure the pulleys are running true and don’t have chips in them. If it’s a cog type, make sure the cogs are clean. Double-check the set screws that hold the pulleys to the drive shafts. They will have Allen screws that can loosen up. Tighten as necessary.
Third, check the slides or Gibbs, as they are often called. These are critical to the proper operation of your machine. Most of these slides are designed to be adjusted periodically. They do wear and if you don’t keep them adjusted they will not provide the smooth movement you need for grinding.
Fourth, check for bearing noise. Start the motors one at a time and listen using a mechanic’s stethoscope for minute noises associated with bearing failure. Replace those questionable bearings before your machine breaks down during an important job.
You should listen to your valve chuck as well. It will talk to you when it needs service. Each manufacturer has a very specific procedure for this adjustment. Make sure you consult the manual for the proper method for your model. Put a piece of drill stock in the chuck and get out your dial indicator to check the degree of run out you have. If it’s excessive, readjust your chuck to the correct level. In the event the run out does not improve it’s time to replace the chuck. Always consult the manufacturer’s manual to insure this procedure is done properly.
There may be times when you need to work on very small-stemmed valves. Most of the later multi valve overhead cam cylinders have extremely small stem valves as small as 4mm. When this job comes in don’t turn it away, you can add a chuck adaptor that is designed to accommodate these smaller valves (we recommend our Order No. UVRC-46).
Now that everything is clean, repaired and adjusted you can start grinding valves. Start by putting in real valve grinding oil – stop using transmission oil; it simply is not designed for grinding valves! Keep in mind there are some machines designed to run synthetic water based coolant.
Mount the stones according to the procedure in your instruction manual. There are many varieties of stones to choose from because there are so many new alloys used in today’s valves. There is not one wheel that will grind all valves. Always match your stone to the material you are grinding: stainless, titanium, iron, stellite or inconel. You will have to change the wheels and stock a variety of wheels, but you will notice the results of your labors by the finish on the valve faces.
It is important to dress the wheel and rotate your diamond. Use a quality diamond that has a point. You can affect how a wheel grinds by adjusting the speed in which you dress. When you dress slowly across the face of the wheel you will close off the grains and deliver a smoother finish. However, you may have to dress more often. When you dress fast across the stone you will open up the grain and it will grind faster but not always leave the finish you desire. Dressing speed can be adjusted, as needed, for the valve material you are using.
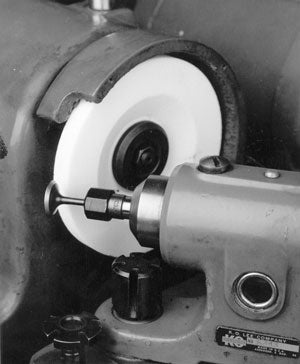
Dressing the butt stone is critical as well. First, check to insure the butt grinding attachment is true to the wheel using a dial indicator. Sweep the surface; if it is not 90 degrees adjust it until it is. Again use a sharp diamond and dress this stone as you would the valve face stone.
Remember it’s the shop that takes extra care of their machines that also gets to take extra care of their customers. Your customers will appreciate you providing them with a clean, quality product, mirrored by the organized and well-maintained shop you keep.
Remember, if you have more questions, contact the Goodson Tech Department at 1-800-533-8010 (customers outside the US & Canada, please call 507-452-1830).
