From Chris Jensen (retired)
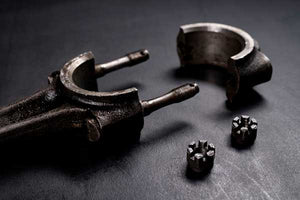
Most engine rod failures aren’t from faulty parts, they’re from improper installation. When you’re installing the rods you need to check the rod bolt stretch by performing a series of torqueing and loosening and recording the readings. It sounds like a lot of work, but in the end, it will save you time and the possibility of a failed engine rod along with all of the damage that can cause.
When you get a new set of connecting rods they should include manufacturer specs for torque and bolt stretch. These specs have been determined through all kinds of testing that is far too detailed to go into here. Let’s just say, the manufacturers know what they’re doing. They have scientists and engineers who study this stuff day in, day out so we don’t have to.
As you know, engines undergo a lot of stresses as they operate; especially those used in high performance applications. The engine is only as strong as its weakest component and you sure don’t want that to be a rod bolt. Unlike most fasteners in an engine, you can access both ends of the rod bolt for easy measuring so here’s where you can really ensure a strong connection.
So, what happens if you don’t achieve proper bolt stretch? Potential disaster.
Okay, that might be overstating it a little, but remember without proper bolt stretch the rod and rod cap will separate a little with every cycle of the rod and piston assembly. As the stress is relieved the rod and cap return to the previous state. With that happening over and over the metal in the bolt will eventually fatigue and failure will follow.
I don’t know about you, but I sure wouldn’t want that to happen in the middle of a run at high horsepower.
To reduce the chances of that happening let’s look at the proper procedure for adjusting rod bolt stretch. You will, of course, need a Rod Bolt Stretch Gauge (Goodson Part No. RBSG-3) to perform this procedure.
- Install the rod cap and insert the bolts. Use a high pressure fastener assembly lube (such as the Goodson EPL-4) on the threads and the seating surface.
- Snug the bolts and seat the rod cap gently using a nut driver or ratchet
- Loosen both bolts to release any preload.
- Zero your stretch gauge and measure each of the bolts to determine the free length. Record your reading.
- Torque both bolts to 25 to 30 ft-lbs or below the recommended torque to create a small amount of preload.
- Now tighten one of the bolts to the manufacturer’s specified torque and measure the stretch. You may need to increase torque to achieve the recommended stretch.
- Once you’ve achieved the recommended stretch, loosen the opposing bolt and retighten it carefully until the proper stretch is achieved.
- Check and record the torque required to achieve recommended stretch.
- Repeat this procedure for every rod bolt. Be sure to zero your stretch gauge for each rod bolt and apply the same amount of assembly lube to all threads and seating surfaces.
As usual, if you have additional questions, contact the Goodson Techxperts by email or phone (800-533-8010 or 507-452-1830).


